

AWARD WINNER
2026 NARI of Greater Phoenix Remodeler of the Year for Residential Bath $70,000 – $100,000
Master Bath Renovation| Historic Home, Modern Accessibility, Timeless Design
Some bathrooms just need new tile and fresh paint. This one needed a complete rethink — and it got one.
The clients came to us with a clear vision: they wanted a master bath renovation that actually worked for them. Not just a bathroom that looked better, but one that moved better, felt better, and would serve them well for years to come. They also cared about the home’s Spanish-colonial roots and wanted that character to come through in the finished space. That combination — accessibility, luxury, and historic authenticity — is exactly the kind of challenge we love. We think the before-and-afters speak for themselves — take a look.
BEFORE AND AFTER PHOTOS
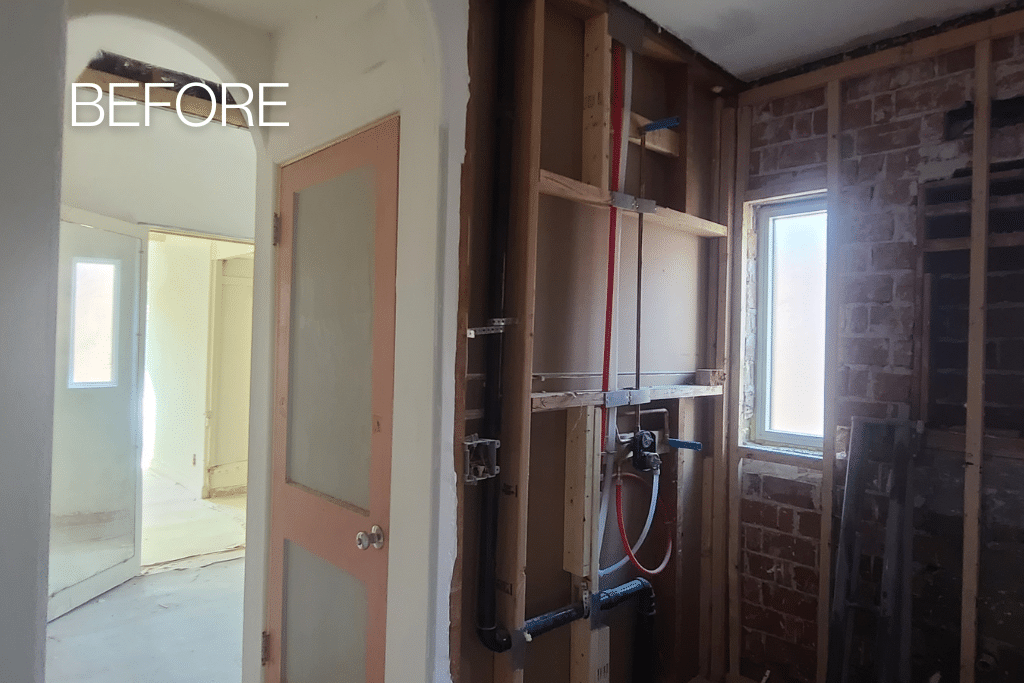
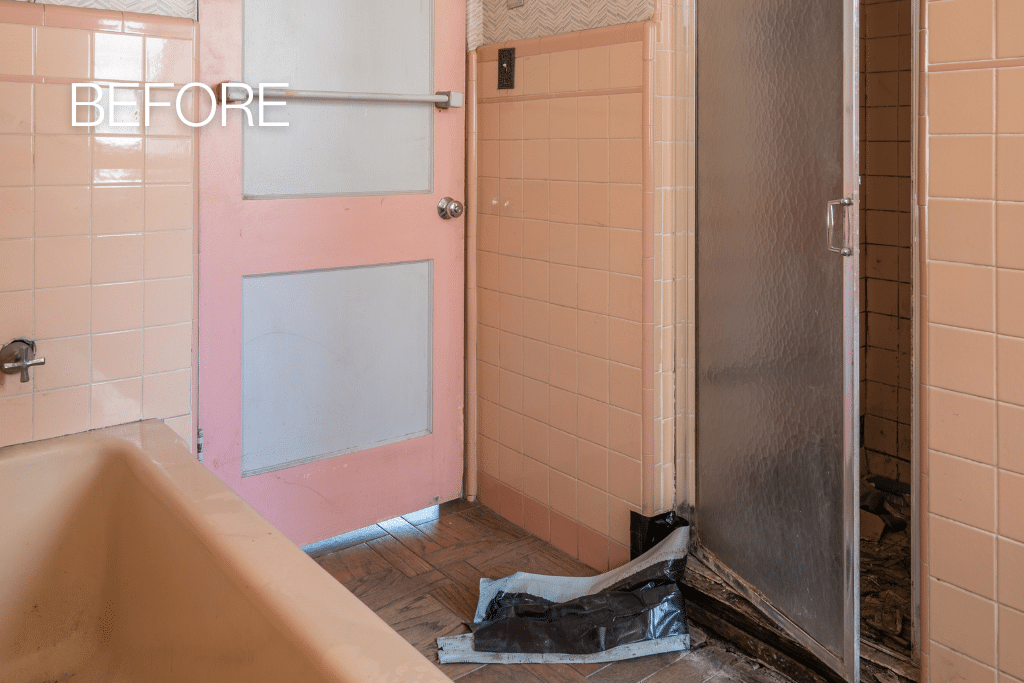
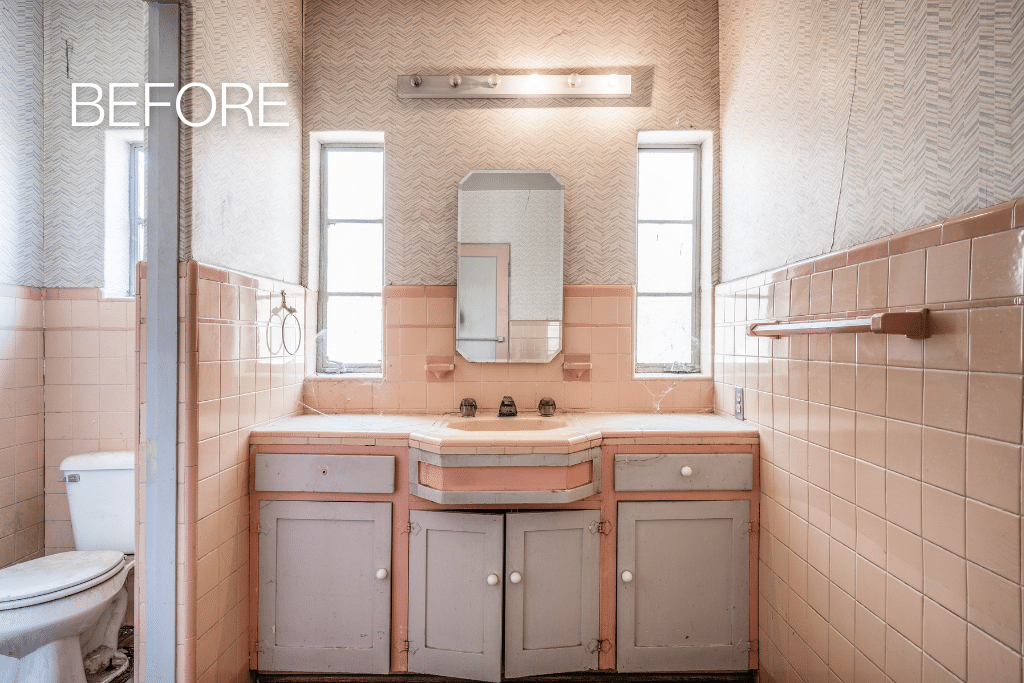
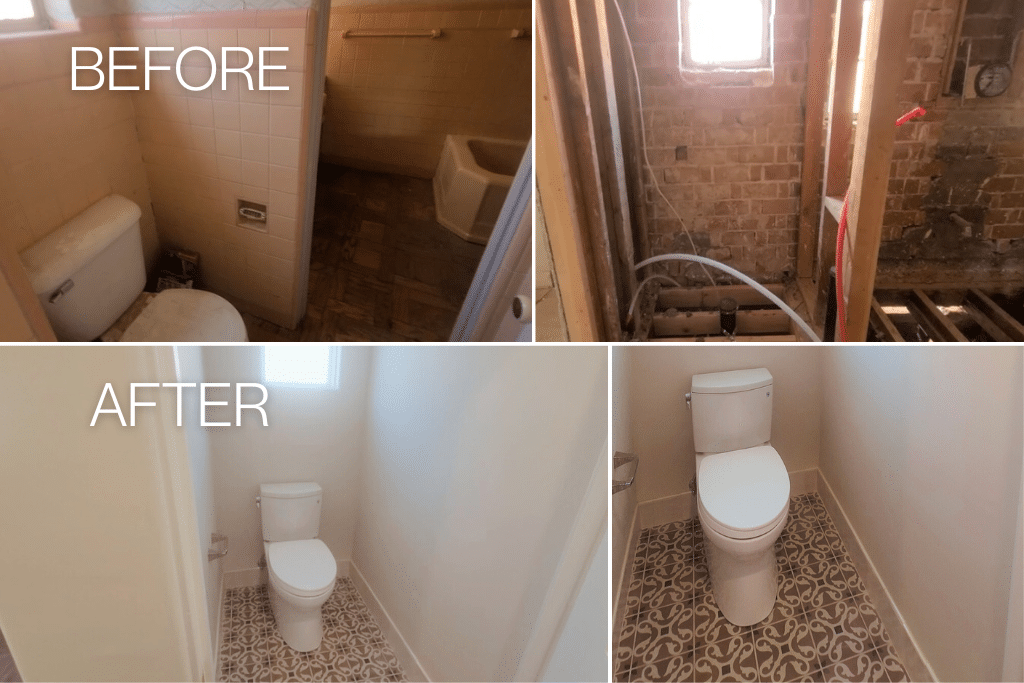
What the Space Was Before
The original bathroom had accumulated decades of compromises. Pink tile from another era. A leaking shower that had long since stopped earning its place. A tub that ate up floor space without justifying it. An HVAC system that had been added after the fact, with ductwork crammed underground where nobody could easily reach it. A water closet with a furred-out wall eating into the clearance. Two doorways that interrupted what should have been a natural, flowing sequence between the closet, the vanity, and the shower.
It wasn’t beyond saving — it just needed someone willing to take the whole thing apart and put it back together the right way.
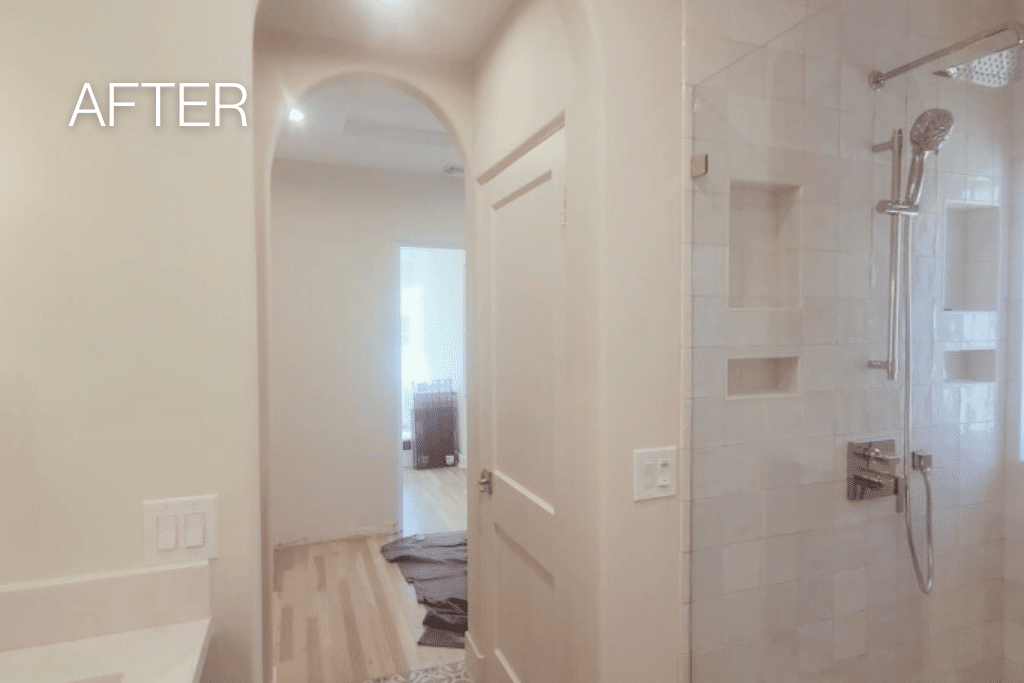
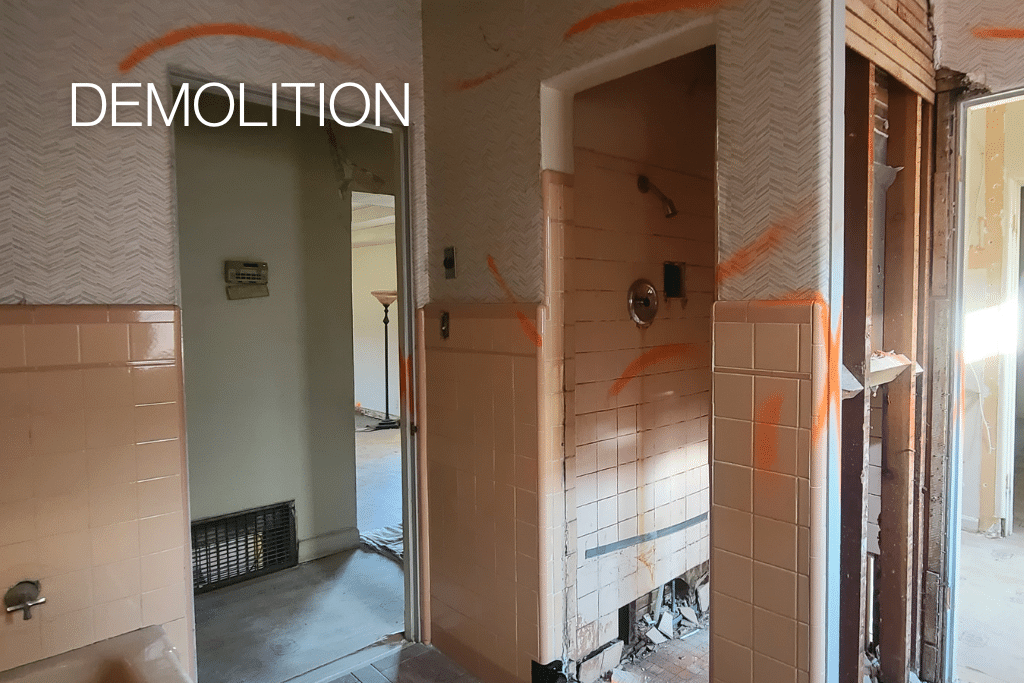
The Layout Comes First
Before any finish material was chosen, we reconfigured the entire traffic pattern. The key move was replacing two existing doorways with a pair of arched openings — a nod to the home’s Spanish-colonial character that also opened up the circulation in a way square frames never could. Walking from the master closet through to the vanity and into the shower now feels like one continuous, intentional sequence rather than a series of disconnected rooms.
We relocated the shower to take advantage of natural light and give it a proper footprint. We enclosed the original public entryway to create a genuinely private ensuite. And we found space for a custom-built-in alcove across from the water closet — not just storage, but a landing station with a built-in charging station. Practical details that don’t usually make it into renderings, but that clients notice every single day.
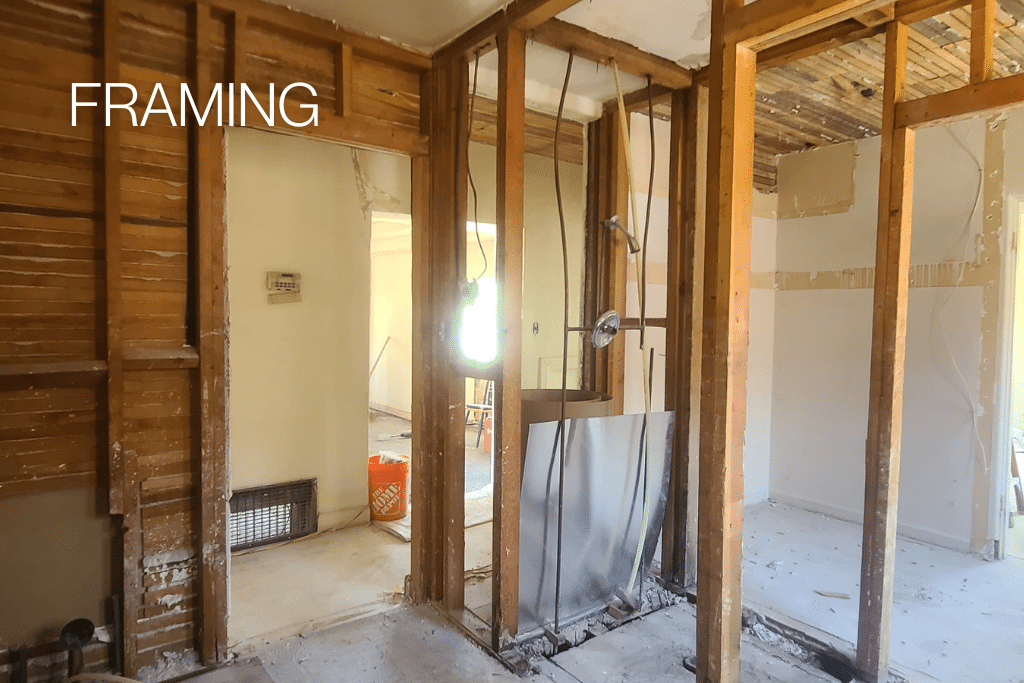
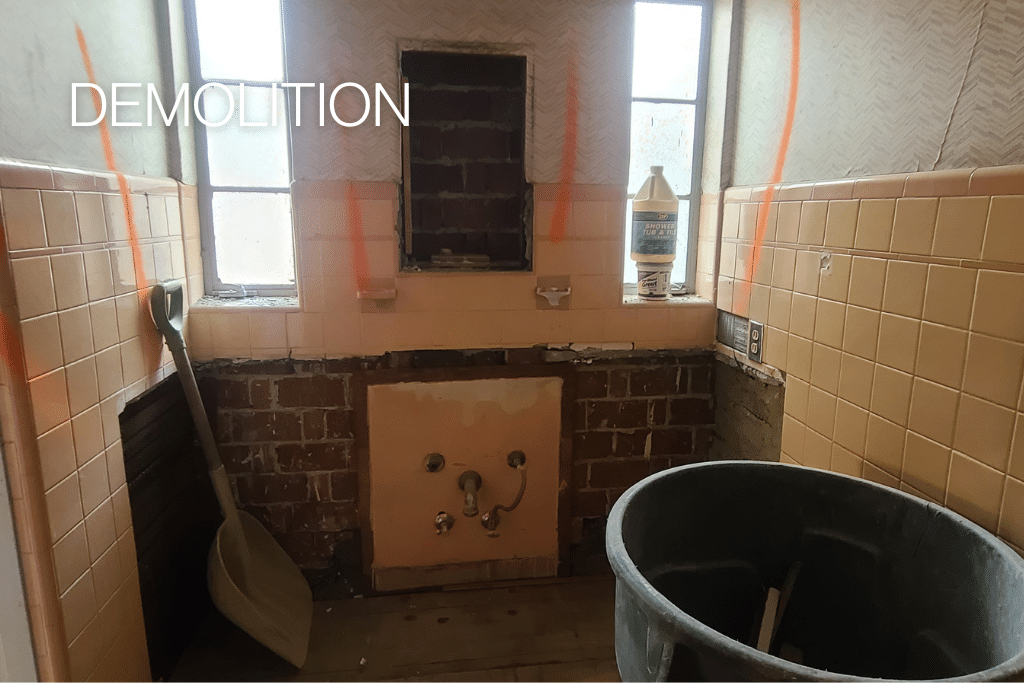
The Curbless Shower Was the Hardest Part
If there’s one place this master bath renovation demanded the most from us technically, it was the shower floor.
The home was built in the 1930s on a crawl space foundation. To achieve a true zero-threshold entry — no curb, no step, no trip hazard — we needed to lower the shower floor three inches below the surrounding bathroom floor. In a newer home with a slab or accessible framing, that’s a known challenge. In a 1930s crawl space house, an engineering solution was required from scratch.
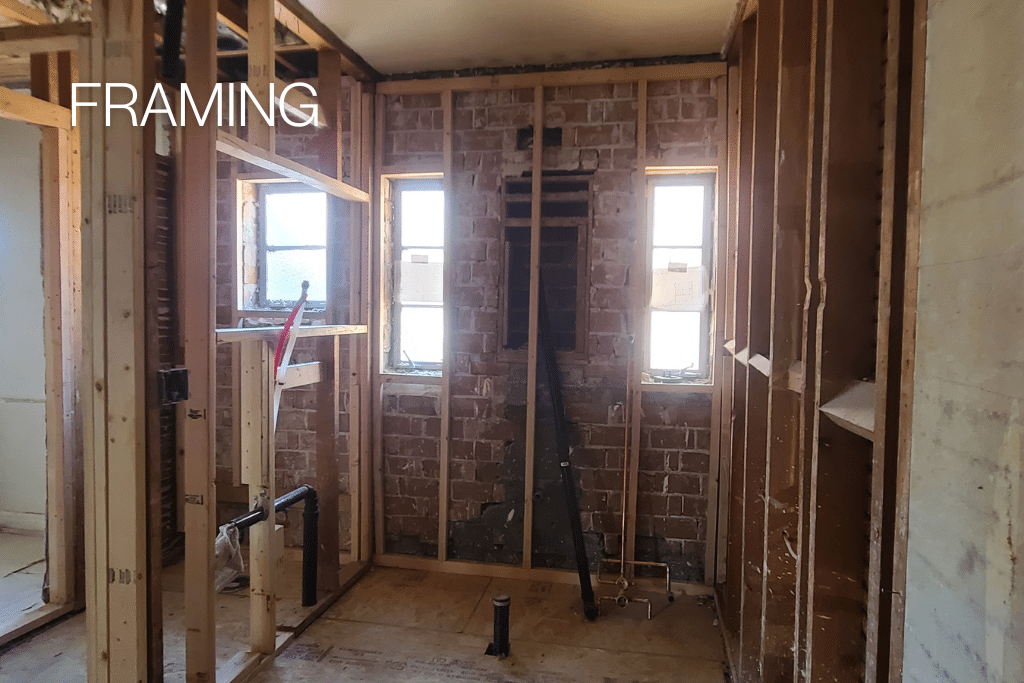
We carefully removed the existing floor joists beneath the shower area. A 2×12 ledger board was fastened to the adjacent joists on one side. On the opposite side — an exterior wall sitting on a concrete footing — we anchored another 2×12 ledger directly to the footing using 5/8″ x 6″ Red Head expansion anchors, set precisely three inches below the original floor level. New floor joists were installed at the lower elevation, and a concrete footing with a 4×4 post was added to carry the load properly.
The result is a curbless shower that doesn’t look like an accessibility feature — it looks like it was always meant to be exactly this way.
The floor transitions seamlessly, the drainage is calibrated with a central drain and minimal slope, and the 2″ porcelain hexagon tile on the shower floor creates a clear visual distinction from the bathroom floor without feeling abrupt. Clean, safe, and built to last.
The HVAC Was Underground. We Fixed That.
This is one of those behind-the-scenes problems that never shows up in the after photos but completely changes how the space functions.
The home was originally built without air conditioning. When the system was added later, ductwork was routed underground — under the wood floors, which made it inefficient, inaccessible, and caused temperature inconsistencies throughout the suite. Replacing the arched doorways required moving the ductwork anyway, so we took the opportunity to do it properly: new supply and return lines rerouted through the attic above the master suite. Better efficiency, easier access to service, consistent comfort. Nobody will ever see it, but they’ll feel it every day.
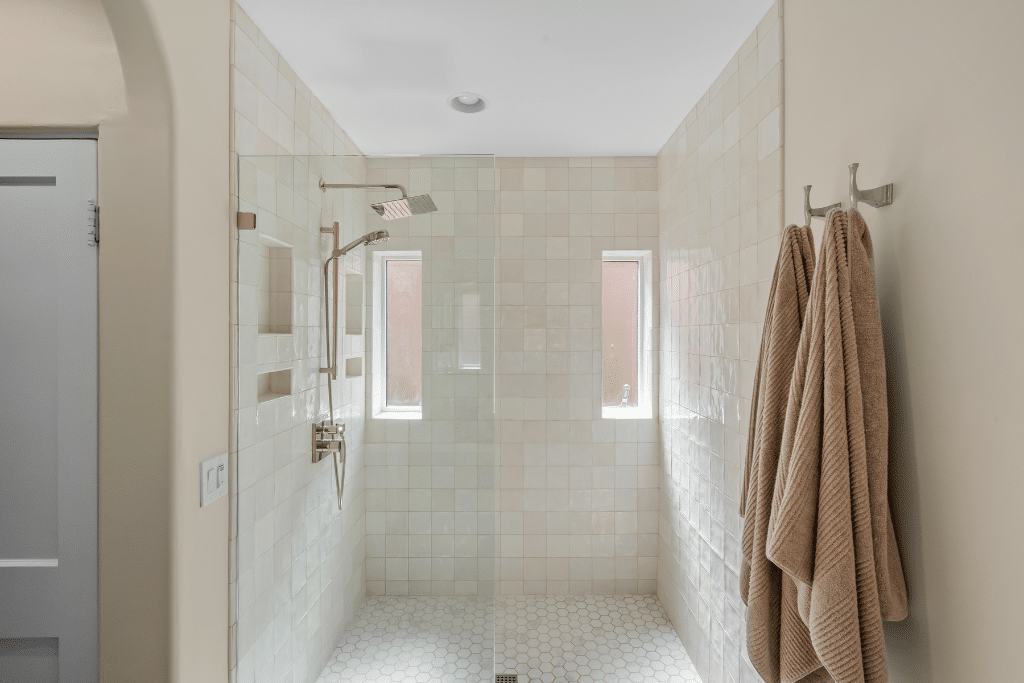
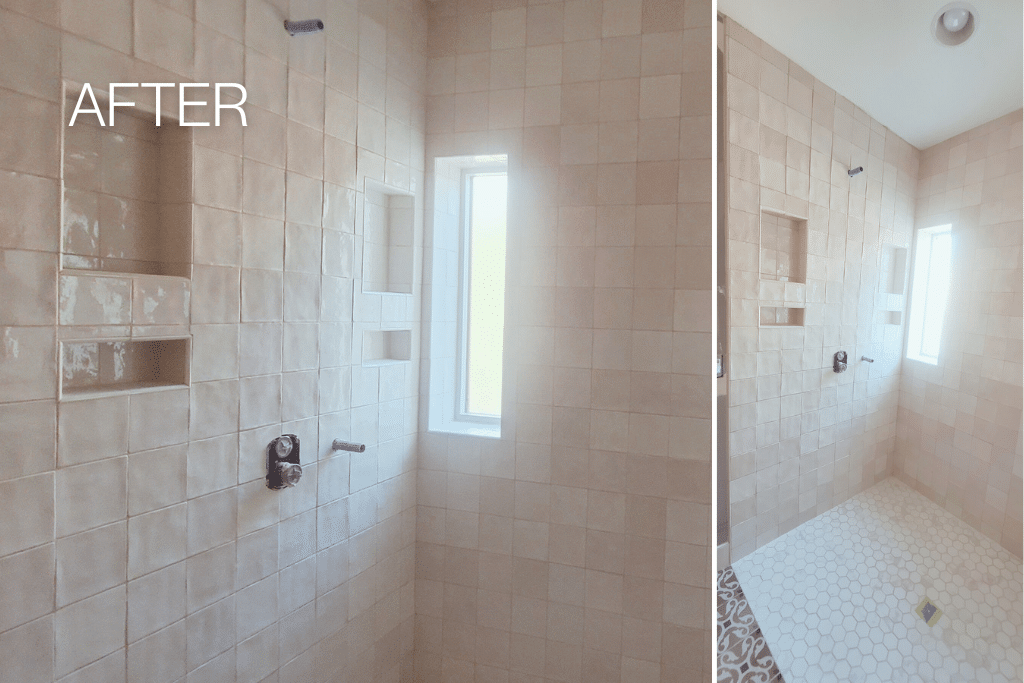
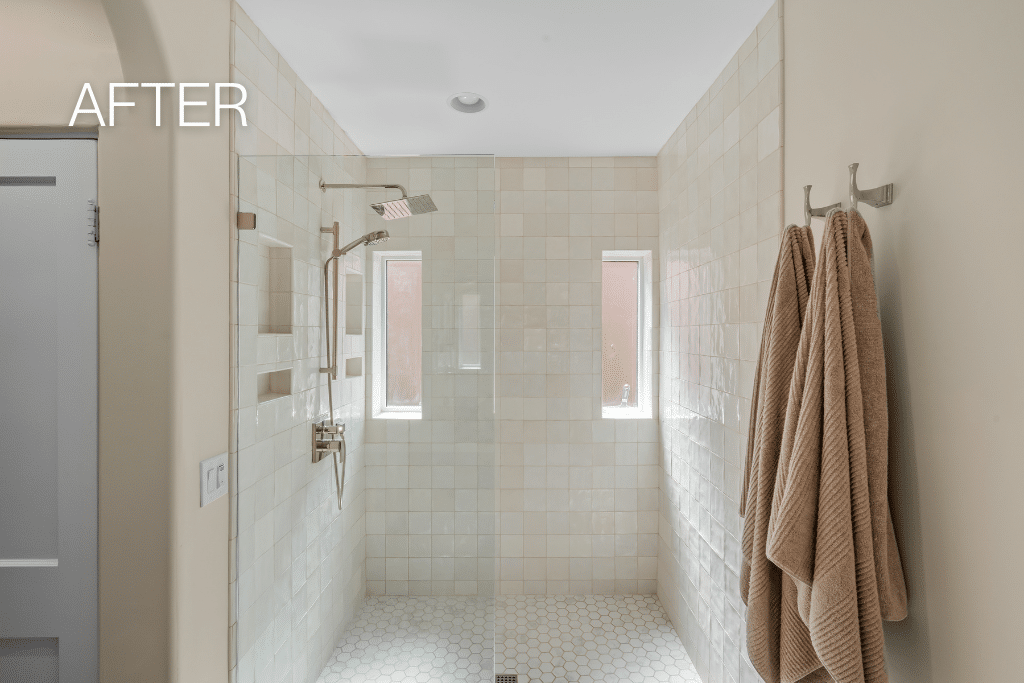
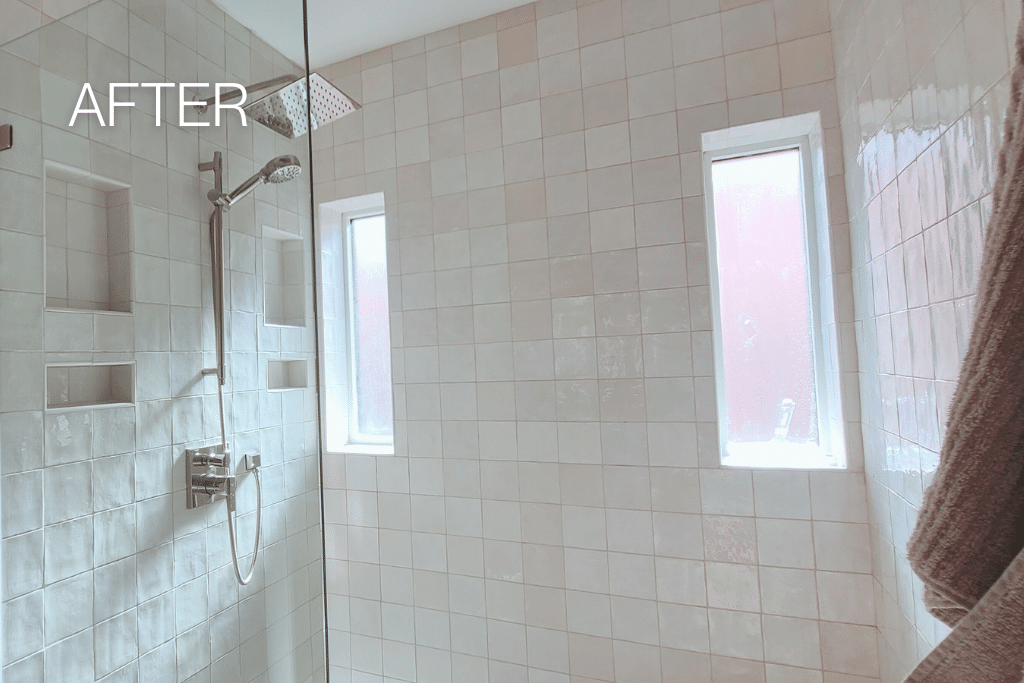
A Shower Worthy of the Effort
The shower itself became the focal point of the room — and that was entirely intentional.
The original double brick exterior walls couldn’t just be tiled over. We furred them out, added foam board insulation, installed concrete board, and fully waterproofed the walls and shower pan before laying a single tile. Arizona Tile Flash Ivory 5×5 Zellige tiles cover the walls — a handmade, slightly irregular tile that catches light in a way ceramic never does. Dual-wall niches flank the windows symmetrically. A recessed vent fan/light with a vapor barrier sits flush in the ceiling. Glass enclosure, polished-nickel fixtures, no visual clutter.
The shower doesn’t just look good. It’s also been future-proofed: plywood blocking runs along the walls wherever grab bars might eventually be wanted, and the design accommodates a wall-hung seat. Accessibility is woven into the architecture, not bolted on later.
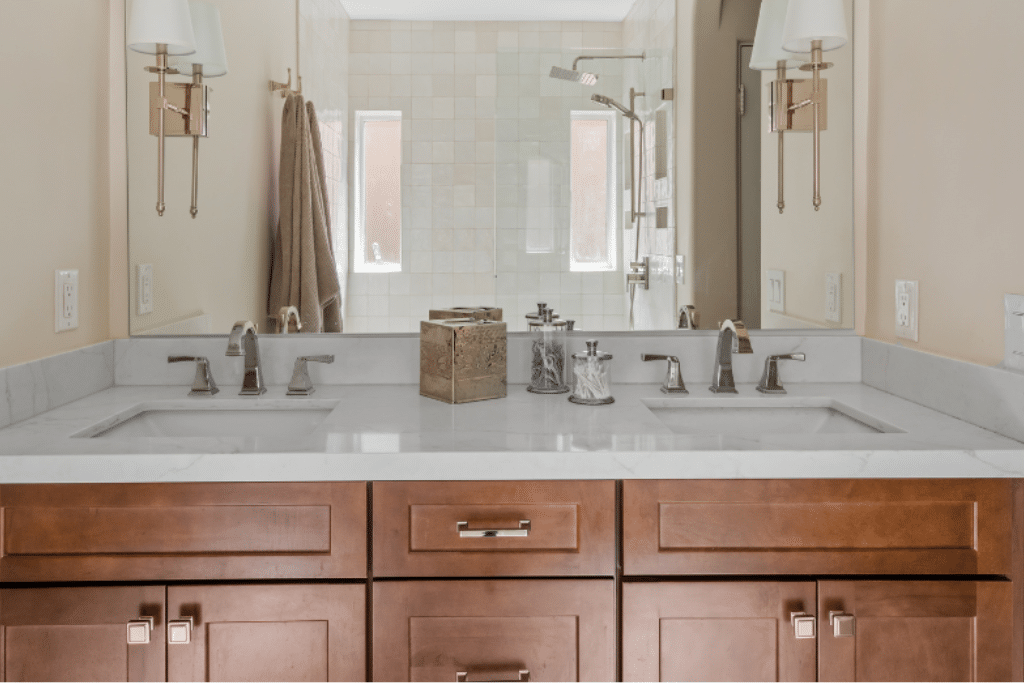
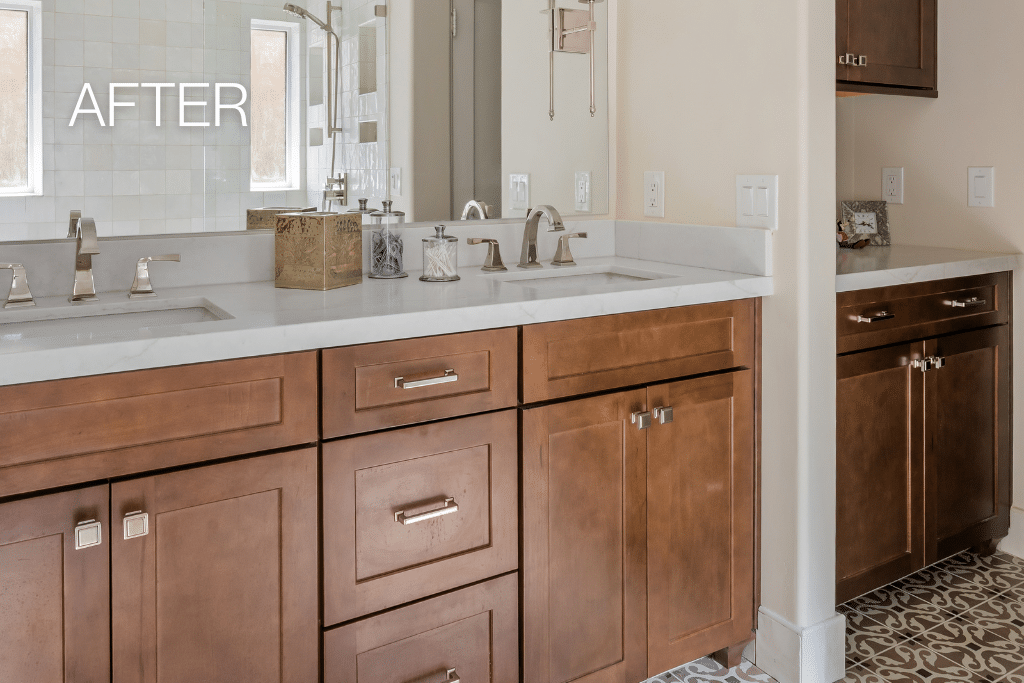
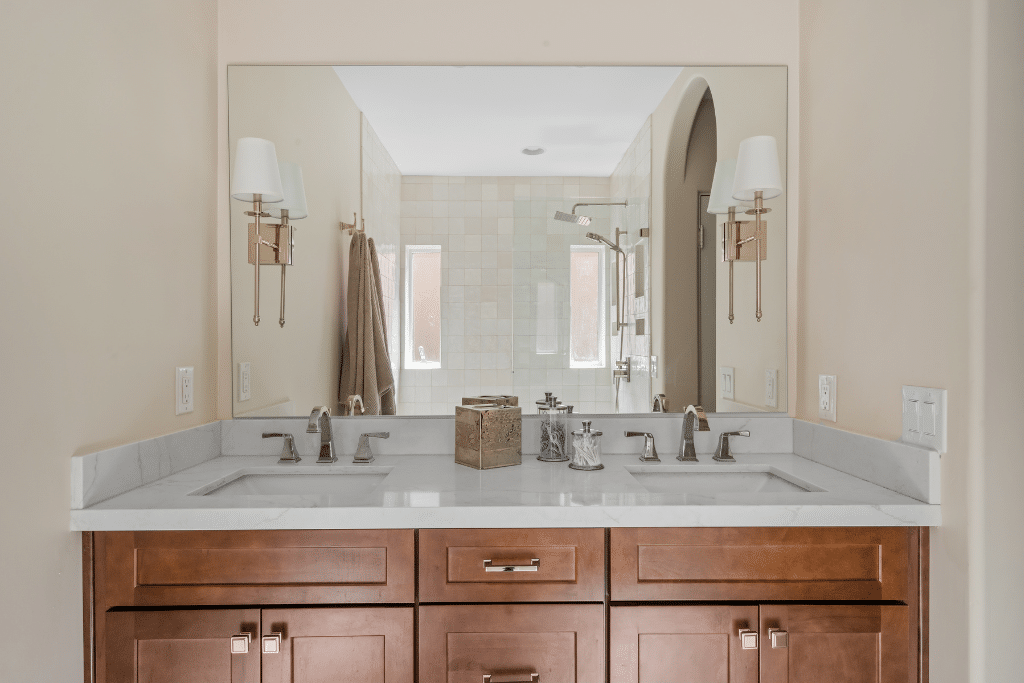
The Vanity and the Water Closet
The vanity wall got a complete rebuild. Custom cabinetry — warm, wood-stained, detailed with the kind of raised-panel work you’d expect in a home of this era — runs the full length of the wall—quartz countertops, dual undermount sinks, polished nickel hardware throughout. Mirror-mounted sconces provide balanced task lighting on each side without the harsh overhead-only look. The old lock cutout in the preserved water closet door was filled and refinished. You’d never know it wasn’t original.
The water closet regained its full width when we relocated the toilet vent to the shared shower wall, eliminating the furred-out section that had been eating into the clearance for years. A new privacy window brings in natural light. A recessed ceiling vent handles air exchange without occupying any visual space.
The Details That Make It Spanish-Colonial
The finish palette was chosen to honor the home’s era while feeling thoroughly current. Spanish Colonial–inspired cement tile covers the bathroom, water closet, and closet floors — a bold graphic pattern that grounds the whole space. The shower walls are calm and light by contrast, with the warm Zellige tile keeping the mood serene rather than stark.
Arched doorways, warm cabinetry, polished nickel, layered lighting — every element was chosen to feel cohesive. This isn’t a modern bathroom dropped into an old house. It’s a bathroom that belongs here.
The Result: A Master Bath Renovation Done Right
What was once a fragmented, dated, and inaccessible space is now a retreat that functions as well as it looks. This master bath renovation gave the clients the accessibility they planned for, the storage they needed, and a bathroom that reflects the care and character of the home they love.
The work that made it possible — the engineered subfloor, the rerouted HVAC, the waterproofed brick walls, the careful plumbing under a crawl space — none of that is visible in the finished photos. That’s exactly how it should be.
Home Remodeling in the Greater Phoenix Area
AWARD-WINNING HISTORIC HOME RENOVATION IN THE WILLO NEIGHBORHOOD
For high-end home design, build, and remodeling in the greater Phoenix area that reflects your vision, Homework Remodels will help you love your home again. Start your project by calling us at (602) 478-5102 or emailing steve@homeworkremodels.com to discuss your remodeling project. We offer a free in-home consultation.
Our NARI-certified award-winning designers and craftsmen are eager to work with you to make your vision for your home a reality! To help you plan your remodel, you can find great information in our Core Guides. Learn more about our Design-Build Approach, where we unite preconstruction planning, design, budgeting, and construction under one experienced team. This streamlined process allows for greater transparency, reduces risks, and accelerates timelines, making it the smarter, more efficient way to remodel and build.
